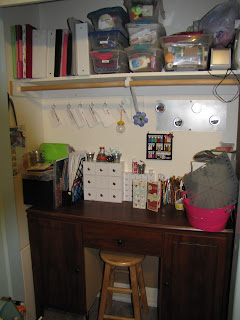
 Hooray for rainy days! I have finally gotten time to organize my craft supplies and area. I've transformed the closet in our spare bedroom into my craft space. I've managed to fit my desk and supplies in there and on one little white bookshelf (not pictured). Now I am able to find everything AND have room to work! :)
Since I am showing you my craft space, I thought it'd be a perfect time to show you my holiday planners. I made two, just to try different patterned papers. But the awesome thing about these is that they are reuseable. Most planners are a one time deal. Not these! You just take out last years lists and calender pieces and print out new ones for this year. It helps me stay more organized. These are great for yourself or for gifts. I think the perfect time to give these out would be Thanksgiving, so that people could start getting gift ideas while family is around, and they will have them early enough in the season that they'll be able to use them that year.
Supplies Needed:
glue dots
2- 11"x 7" cardstock (solid)
12- 6.75" x 3" decorated papers
6- 4"x 3" decorated papers (envelopes)
1) Score both pieces of 11x7 cardstock at 3.25", 3.5", 6.75". 7", and 10.25".
2) Valley all score marks. Attach the sheets together at the 10.25" score, where these two attach together will be your binding. You should now have one long piece that measures 7"x21".
 3) Attach the 12- 6.75x3" decorated papers between the scored lines on both sides. Making sure to pay attention to where the cover paper will go.
4) Make pockets using the 6- 4"x3" pieces of paper. To make the pockets score the three side (not top) at 1/2" seem. Cut at an angle where the score lines intersect. Valley fold the scored lines and attach to the 6 panels inside. Attach using glue dots only on seems since these are your pockets that you'll put in the planning sheets.
 5) Decorate as you see fit. Add the planning sheets that you can print off from http://christmas.organizedhome.com/printable/christmas-pocket-planner or go to:
www.organizedchristmas.com, go to printables tab at top of the page, then click christmas planner, then scroll down to find "pocket planner forms". The first example that pops up (right now), is Lisa's Christmas Pocket Planners, and in the description is a highlighted phrase "Christmas pocket planner forms" You'll find the forms there. I use "stocking stuffers, gift list, gift ideas, menu, decorations, and shopping list" to fill up my planner, but there are others to choose from.
 6) Fold up, bringing the panels in, keep folding until you can't fold anymore. If you feel that it need to be held closed, use ribbon, elastic gold cord or a rubber band.
(right) Finished Project.


