Saturday, October 30, 2010

Friday's Tasty Treat (a day late since yesterday was the day from hell)

I decided after looking through hundreds of Martha Stewart's fall recipes that I needed to attempt atleast one of them. I finally settled on these Dulce de Leche Bat Cookies. I hunted down the dulce de leche (advice: its WAY cheaper at a Hispanic grocery store than say, Safeway). The only thing I ran into is that it asks you to have an aspic cutter set to make the wings, I personally don't know what that is and wasn't going to buy one just to make these cookies, so I used a regular pumpkin cookie cutter instead. These are chocolate sandwich cookies, which you fill with dulce de leche (which is like soft caramel spread). They sweet but delicious! Nick LOVES caramel so these were right up his alley.

It took a couple tries to get the dough to roll out. I actually doubled the recipes because I thought I would want more than 18 cookies, but with the difficulty I had with the dough I still ended up with 18 cookies. I found that rolling the dough out on floured parchment paper (because without the flour they will still stick to the paper), was the best way. I did cut some and then roll the rest of the dough back into a ball and rolled it out again to get a few more cookies, but those cookies, once baked, had a different finish on the top, almost crackly. I just made those the bottom of the sandwich cookie since you wouldn't see it anyways. The recipe I am giving you is the original, not doubled. Mine aren't even close to what Martha's looked like, but in the end they are yummy and they don't last long in this house! :)

Dulce de Leche Bat Cookies

3/4 c. all purpose flour, plus more for dusting
1/4 c. unsweetened Dutch-process cocoa
3/4 t. coarse salt
1/4 t. baking powder
2 T. unsalted butter, room temperature
1/4 c granulated sugar
1/4 c. packed light brown sugar
1 large egg, plus one yolk
4 oz. semisweet chocolate, melted and cooled
1/2 t. pure vanilla extract
1/4 c. plus 2 T. dulce de leche

Whisk together flour, cocoa, salt, and baking powder. 
Beat butter and sugars with a mixer on medium speed until pale and fluffy. Beat in egg, yolk, chocolate, flour mixture, and beat until just combined. Shape into a disk, wrap in plastic, and refrigerate 1 hour.

On a lightly floured surface, roll out dough to 1/8 inch thick. Cut out the 36 rounds with a 2 inch cutter, and space 1 inch apart on parchment lined baking sheets. 
Using and aspic cutter set, cut out a triangle, point side up, and in the center of the half of the cookies, and then use the half moon cutter to make one wing on each side of the triangle. Refrigerate for 30 minutes.

Preheat the oven to 375* F. Bake until set, 7-9 minutes. Let cool. Top each uncut cookie with 1 t. dulce de leche and top with a cut out cookie.
Sunday, October 24, 2010

Crafting!


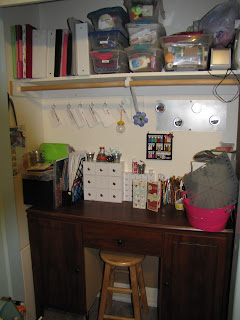
Hooray for rainy days! I have finally gotten time to organize my craft supplies and area. I've transformed the closet in our spare bedroom into my craft space. I've managed to fit my desk and supplies in there and on one little white bookshelf (not pictured). Now I am able to find everything AND have room to work! :)

Since I am showing you my craft space, I thought it'd be a perfect time to show you my holiday planners. I made two, just to try different patterned papers. But the awesome thing about these is that they are reuseable. Most planners are a one time deal. Not these! You just take out last years lists and calender pieces and print out new ones for this year. It helps me stay more organized. These are great for yourself or for gifts.  I think the perfect time to give these out would be Thanksgiving, so that people could start getting gift ideas while family is around, and they will have them early enough in the season that they'll be able to use them that year.


Supplies Needed:
glue dots
2- 11"x 7" cardstock (solid)
12- 6.75" x 3" decorated papers
6- 4"x 3" decorated papers (envelopes)

1) Score both pieces of 11x7 cardstock at 3.25", 3.5", 6.75". 7", and 10.25".

2) Valley all score marks. Attach the sheets together at the 10.25" score, where these two attach together will be your binding. You should now have one long piece that measures 7"x21".

3) Attach the 12- 6.75x3" decorated papers between the scored lines on both sides. Making sure to pay attention to where the cover paper will go.

4) Make pockets using the 6- 4"x3" pieces of paper. To make the pockets score the three side (not top) at 1/2" seem. Cut at an angle where the score lines intersect. Valley fold the scored lines and attach to the 6 panels inside. Attach using glue dots only on seems since these are your pockets that you'll put in the planning sheets.

5) Decorate as you see fit. Add the planning sheets that you can print off from http://christmas.organizedhome.com/printable/christmas-pocket-planner or go to:
 www.organizedchristmas.com, go to printables tab at top of the page, then click christmas planner, then scroll down to find "pocket planner forms". The first example that pops up (right now), is Lisa's Christmas Pocket Planners, and in the description is a highlighted phrase "Christmas pocket planner forms" You'll find the forms there. I use "stocking stuffers, gift list, gift ideas, menu, decorations, and shopping list" to fill up my planner, but there are others to choose from.

6) Fold up, bringing the panels in, keep folding until you can't fold anymore. If you feel that it need to be held closed, use ribbon, elastic gold cord or a rubber band.


(right) Finished Project.

Autumn Brunch Waffles with Cinnamon-Cider Syrup


I've been looking for some yummy fall breakfast recipes and I think I found a new favorite! Autumn brunch waffles are a cinnamon apple waffle, and then you make the cinnamon-cider syrup yourself-its amazing! Almost everyone has bisquick in their pantry, so I thought this would be an easy twist to regular waffles and syrup, and everyone can do it.

Cinnamon Cider Syrup
1 cup of sugar
3 T. bisquick 
1 t. ground cinnamon
2 cups of apple cider
2 T. lemon juice
1/4 c. margarine or butter

Mix sugar, bisquick, and cinnamon in 2 quart sauce pan. Stir in cider and lemon juice.
Cook over medium heat, stirring constantly, until mixture thickens and boils. Boil and stir for 1 minute. Remove from heat and stir in margarine until melted. Keep warm and start waffle batter.

Cinnamon Apple Waffles
2 1/4 c. bisquick
1 1/4 c. milk
2 T. sugar
2 T. vegetable oil
1 t. ground cinnamon
1 egg
1/2 c. finely chopped, peeled apple (I used granny smith, but gala's work too)

Stir all ingredients together except the apple in a large bowl until blended.
Stir in apple. Pour butter for waffle onto center of hot waffle iron. 
Bake till your light goes off, or about 5 minutes, or when steaming stops.Serve with syrup.

*These come courtesy of Betty Crocker Bisquick Cookbook

Saturday, October 23, 2010

Looking back while moving forward...

Almost 3 months ago, I started this blog to bring homemade food recipes to people. I wanted to expand my culinary skills and try new foods. Tonight, I feel like I have failed in ways. But I realize that I held unreal expectations. On one hand, I have discovered a new love of Indian food - naan bread, chicken tikka masala, and I've successfully cooked for my family 90% of the time without having to repeat the same meals over and over (though some are repeats for a reason), and I've been able to control what my family is putting in their bodies.

I've learned to make my own tortillas, and no longer have to buy refried beans, rice-a roni, spice mixes, bread, peanut butter, pesto, roast chickens, alfredo sauce, spaghetti sauce, applesauce, canned fruit, or pickles, thanks to my new recipes and skills as a cook. I am able to embrace recipes with ingredients I'm not aware of, I'm able to use new techniques with little hesitation and I've found that sitting down with a cookbook can be as relaxing as reading my favorite book. My daughter now knows kitchen tips, and will say "we can make this at home huh" instead of needing to pick up any fast food. I've been able to replicate recipes from restaurants, which has helped financially. If we can make it at home, there's no reason to go out and get it.

Finally, even though I have disappointed myself in ways with this blog, I'm happy that my family is learning that not everything has to come from a restaurant in order to taste good, and that there is a certain amount of pride when everyone ooo's and ahhh's over your dishes. I'm going to make a strong effort to come up with meals that aren't only family friendly, or out of the box, but that are just yummy and will allow others to come to love their kitchen. This next week I'm hoping to post some delicious meals, sides and desserts. It test kitchen time!

Wednesday, October 13, 2010

Dad's Cake Bake!

 So last night was the PTO's Dad's Cake Bake. Each year they have a theme and parents, preferably the dad's, but everyone does it, make a cake to best fit that theme, or one of the other ribbon categories like most scrumptious, etc. Then they award ribbons, and then we auction off the cakes to raise money for PTO activities. So this year the theme was "Traveling Down Memory Lane" so we decided to go with something retro, from our childhood. So pacman it was! :) So we made a pacman cake, well actually Nick and Izzy made it. All I did was frost it and sort of guide them with the theme, but I thought it came out really cute, and I was proud of Izzy and Nick for working so hard on it and having fun with it.

Normally when we do a cake, like last year, we think we have a good idea and then we get there and are sorta like oh man there are way better cakes, but this year I was really proud of our cake, and PTO was selling hot dog meals near where our cake was so I got to hear the judges, and parents and kids who saw it, and everyone seemed to love it. So then they announce the winners of each category and we come away with nothing, BUT then they start the honorable mentions, and the say "and now for the cake that has taken us all down memory lane and reminded us of our days in the arcade, the pacman cake!" and I swear we got the best applause and cheers. So we did come away with honorable mention and a ribbon, and Izzy was thrilled with it. So that's my fun night and here is our cute cake, with Izzy, and then her ribbon.

Sunday, October 10, 2010

Amazing!

Mrs. Susan Beth Pfeffer emailed me this morning! For all of you  who are wondering who she is, she's an amazing author! A few months ago I was standing in Walmart waiting for Isabelle to pick a book, her reward for her reading award (I love giving books as a reward! It encourages more reading and it allows mommy to have a few quiet moments for her own reading!). The young adult books were right above the children's books, so I as browsed through a cover jumped out at me, where the moon hung amazingly low in the sky over a lone house in the snow. Life as We Knew It. So I picked it up and started reading the back cover. It sounded like something right up my alley. A meteor hits the moon and pushes the moon closer to earth, thus setting of natural events like earthquakes, volcanic eruptions, and it follows this family, through a diary and eyes of this teenage girl, Miranda Evans. Chaos ensues, no electricity, phone etc. Its story of survival. Amazingly written. Then there is a 2nd book, Dead and Gone, that follows another family the Morales, who live in New York, when the meteor hits the earth. Then the 3rd, This World We Live In,  continues on the two families path to survival. 

Needless to say, I'm a huge fan of this series! So I was going through my www.librarything.com account the other day, thinking about a review to write for these books, when I thought how awesome it would be to have them signed. But then I remembered I live in EASTERN Oregon, you know the side you never hear anything about, the side that isn't rainy and is more of a desert. Where an author signing in Portland means 6 hours of roundtrip driving, and lets be honest, Portland is the only place where anyone comes. So I looked up Mrs. Pfeffer and found that she had a blog...and a cat :)

So I asked if she autographed books and what the protocol of getting one would be. I hoped I would hear back but I didn't expect to.  I embarrassingly gushed, but I wanted her to know how much I enjoy her books, and ask about the autograph. Then SHE EMAILED BACK!! She offered to send me bookplates which she would sign for my series! How amazing! She was super nice and I'm just thrilled to have heard back! 

It's nice to know that in an age of everything internet, everything digital, it can be a good thing. I might never have found a way to contact her, and get my first autographed book otherwise. Reading is my luxury, my me time, my momentary escape, and I'm so happy she's written this series which transported me into a different place and made me think..what if this was me? Amazingly! A huge thank you to her today!

Saturday, October 9, 2010

Fall season Tv!

Directv cancelled...billing dispute in process..grrrr....

However, I still love to relax with my cup of tea in the morning and soak in some mind numbing tv.
So I've become a huge fan of www.hulu.com, its basically got everything I need to watch, for free, and I can save the $70 I was paying Directv.

But this post is about some new shows that have instantly become my favorites. I think I must be in need of some comedy in my life, because these two make me laugh so hard I almost cry.

First "Mike and Molly" on cbs is too funny! Its about these two people, Mike who is a police officer, and Molly whose a school teacher, who meet at overeaters anonymous. The first 3 episodes have followed them through a couple dates. Its too funny. I was hoping it'd be good and not negative to overweight people, you know all the horrible jokes that aren't really funny when your fat. Even though there are a some in there, they are tastefully done and reflected by the characters. At one point in the pilot, Molly is working out on the elliptical and her mom says "Honey your just big boned" and she replies with "Mom bones don't jiggle!" Cracked me up!! You seriously have to check it out.

Next is Raising Hope on fox. I put this on my queue and held off on watching because I wasn't sure if it would be one of those crappy shoes fox likes to push. But it was truly hilarious from the first scene. Its about a guy, who must be like 20, lives with his parents at his grandma's house, life isn't going anywhere, working for his dad's landscaping business, hates it, so then one night a girl jumps in his van while fleeing some guy chasing after her, he spends the night with her and ends up getting her pregnant, she goes to jail because she's a serial killer (guy chasing her was trying to catch her after she tried to kill him), and she has the baby and then gets the electric chair, so this guy, Jimmy, is now responsible for the baby, and he knows NOTHING, I mean nothing! Its seriously funny to watch him try and figure everything out with this cast of white trash, no help family.

So those are what are keeping my busy between mopping the floors and endless loads of laundry. But now that I'm caught up I've been reading constantly. I've read over 10 books in the past month and a half. I've found some really good ones, but that's a post for later. Now I'm off to finish Wicked Appetite by Janet Evanovich.

Friday, October 8, 2010

Tasty Treat Friday!!!

The tasty treat this week has given me issue after issue! I have made a previous tasty treat, but it wasn't so tasty...more like yuck! Perhaps it was the substitution that I used, or maybe its just not my cup of tea, but that was failure #1. Then I made a new indian dish...it was ok..not something I'd post on here though. I think I'll stick with tikka chicken masala instead..that dish was amazing.
So today in theme of the kids' 3 day weekend, making playdough and such, I decided to make a kids tasty treat. Spiced Apple Slices! Yum!
 
Now if you have a food dehydrator that makes this oh so simple. But even for me and my oven it was simple and worth it. Isabelle's having a sleepover and she and her friend both liked these fresh from the oven. But these definately have a lot of spice, your more than welcome to leave out the allspice, the nutmeg and cinnamon and sugar would be enough.
 My grandma used to make apple chips in her dehydrator, but they were more chewy, and that's how I still like apple chips. So mine are pretty much 1/2 chewy and 1/2 crunchy..depending on how thin I sliced them. But its easily adjustable to your personal tastes. 
Spiced Apple Slices 
3-4 granny smith apples, sliced super thin 5 t. granulated sugar  1 t. cinnamon 1/2 t. nutmeg 1/4 t. allspice1/4 t. cloves Put sliced apples and spices in a gallon sized ziploc bag. Shake to coat evenly.

Put parchment paper over cookie sheets and spread apples over the paper. I spread them so that they were barely touching and laying flat, and it took two cookie sheets. Put in a oven set at 250* F for 2 hours, turning once after the 1st hour.


Thursday, October 7, 2010

Updating Needed!

Finally I am getting to the stack of recipes on my desk, some of you have these, some of you don't. But this post is the homemade Mexican night I had this week. Homemade steak tacos, homemade tortillas, homemade salsa, homemade refried beans. Everything was amazing! A million times better than anything I've eaten in a restaurant or bought from a store.

First homemade tortillas are amazing! I mean completely amazing! I don't normally like corn tortillas...they've just had a bit off an off taste to me I guess, but I got yellow corn masa from the grocery store, and decided my first attempt would be with this. I have a recipe for flour, and wheat flour tortillas but I wanted to start small and work up. This was easy, masa, salt and water. Now the hardest part of this was just rolling out the tortillas, cooking them, and then trying not to eat them lol! I definitely need to look into getting tortilla press...yes another gadget for the house, but it would make this process so much easier. But I did it with a piece of saran wrap, non stick spray and a rolling pin. I sprayed the saran wrap with non stick spray, rolled out the masa dough and then plopped it into a small skillet on medium heat, 50 seconds per side. These were so good! Corn tortillas will now be my favorite. It is a little bit of work if your eating more than 4 tortillas, so I think next time I'll prep time to make a bunch and then freeze some.

Then I make my own refried beans in my slow cooker. Super easy, super good, freezable! Perfect. This time I didn't have jalapeno, so I used cayenne pepper and red pepper flakes, and then didn't use chicken stock, I used beef stock which gave it a better flavor then the chicken. This is my opinion though, so if you want to make this recipe, replace the beef stock with chicken, and you can use 1/2 a fresh jalapeno and emit cayenne pepper and the red pepper flakes.  This makes alot! I'm just warning you! Its great for a big family get together, but we end up freezing them. I got the ball canning freezer jars, they're plastic with green tops, and they are like $3 for 4 at Walmart. Then I just fill them with the beans, and put alittle scoop of the reserved liquid on top and freeze. Presto!

Refried Beans

1 onion, peeled and halved
3 cups dry pinto beans, rinsed
1/4 t. cayenne pepper
dash of red pepper flakes
2 T. minced garlic
3 t. salt
1 3/4 t. black pepper
1/2 t. cumin
2 cups of beef broth
6-7 cups of water

Place the onion, rinsed beans, cayenne pepper, red pepper flakes, garlic, salt, pepper, cumin, beef broth, and water in the slow cooker.
Cook on high for 8 hours, adding more water as needed.
Note: if more than 1 cup of water has evaporated during cooking, then the temperature is too high.

Once the beans have cooked, strain them and reserve the liquid. Mash the beans with a potato masher, adding the reserved water as needed to attain desired consistency.

Tips: I usually start with 2 cups of beef broth, and 3-4 cups of water and then add throughout the day, if you aren't going to be home go ahead and add it all at once. I just think that you get more of a concentrated flavor if you gradually add the water.

Now I made my own steak for tacos, and it was great with my go-to spice rub. I use this on my steak, chicken, really anything. Its got some kick thanks to the cayenne but its amazing! You can half, quater this recipe, whatever works for you. For me I just make it and put it in a little tupperware container and save it. It lasts for months. Just add all the ingredients and mix. Done. Then if I put it on meat, I usually sprinkle the meat with a little olive oil, and then rub this spice mix into the meat. Alittle goes a long way.

1/2 c. paprika
3 T. cayenne pepper
5 T. pepper
6 T. garlic powder
3 T. onion powder
6 T. salt
2 1/2 T. oregano
2 1/2 T. thyme

Cooking with Playdough!!!

Oh how I remember being glued to the kitchen table as a kid playing with playdough my mom would make. I loved playdough as a kid, my kid of course loves it, the only thing that doesn't like playdough is my floor lol! But today, with a 3 day weekend for Isabelle, and a cancelled Directv service, and nothing but rain...I decided to revisit playdough and gak. Gak being that gross slimy, but delightfully pleasing goo. I'm starting with playdough today, and tomorrow will be gak.

 But for all the mom's out there this is a go to on those rainy "I'm bored" days. I've got the standard playdough recipe, but with the suggestion of my bestie, Jaime, I add a little vanilla extract or peppermint extract so it smells yummy (caution with little kids you'll have to watch them closer than normal since its smells like a cookie LOL). So Izzy and I spent hours making playdough (took about 5 minutes for 2 batches) and then playing bakery. I let her put the playdough cookies on a tub lid, as the baking sheet, and "bake" then in the oven (which is off). Makes her love this even more.


Playdough Recipe

1 cup flour
1/2 cup salt
1 cup water
1 T. vegetable oil
2 t. cream of tarter
food coloring
1-2 t.scented extract (optional)

Mix together in medium saucepan. Heat and stir until it makes a ball shape.
Take out and let cool enough to handle, and then knead a little bit till smooth.
Ready to use!

Sunday, October 3, 2010

Fall has arrived, outside and in my kitchen!

Today we're cooking crockpot applesauce. Not everyone needs another dinner or dessert, so here's something for your kids' lunchboxes, or just to snack with dinner, or dessert. I love crockpot applesauce since its super easy to make. I make it so much in the fall that I have a little crank apple peeler, but its awesome because for like $7 I got the peeler, corer, and then a slicer. Either way this has to be the easiest thing ever, and of course it tastes better than store bought. Doesn't everything though? A bonus is no need to light a candle today, the smell of this applesauce will fill your house, and that fake apple candle can be saved for another day. :)

I love quick and easy stuff. The crock pot is my best friend in the winter. I saw that Walmart has them on sale, if you don't have one. You seriously can make dinner, dessert, side dishes, and everything in between in them. I use my for *chili *lasagna *roasts *best beef dip ever *applesauce *casseroles (I have a potato and ham casserole that's awesome) *refried beans without the refry plus a million more that I can't remember right now.

Now that things are picking up with Isabelle and school, we're been busy doing cheerleading practice and game, homework's piling on (um anyone else think its not fair that the parents have a ton of homework too!), soon I'll be working at the school (God willing), and this little pot is going to be my lifesaver! 

Crockpot Applesauce

7 golden delicious apples, peeled and cored, and halved
1/2 c. sugar, give or take considering your taste
1/2 c. water
cinnamon to taste

Put peeled, halved apples in the crockpot, and pour water in.
Sprinkle sugar and cinnamon on top.
Cover and cook on low for 5 1/2 hrs. or less


Tips: I use granny smith apples so I need all the sugar, but adjust to your needs. Then if you want chunky applesauce just mash in the crockpot when its done. If you like smoother applesauce, blend in the blender. I do half and half. I mash mine, and then take half of it and blend it. Mix it together and presto!

Saturday, October 2, 2010

Blogging at Midnight

Yes this blog comes to you courtesy of a spider and the navy reserve weekend. How is that possible you ask? Well as I lay in bed, already hating being alone in bed seeing as its my husband's reserve weekend that comes once a month, and something catches my eye above me. A SPIDER!! So what do I do? Hurl my book at it in midair, hit it and watch it scramble off my bed into some secret hiding spot I can't locate. As I grab the vacuum, attach the long nozzle to the end of the hose and seek it out, its apparent that it has an invisibility cloak like Harry Potter. I can't find it anywhere. So now I know there has to be a huge spider, ok its a daddy long legs and I know it won't kill me, but it wanted to land on me once and that's not happening again, under my bed. My cat, Max was under the bed at the time it would  have went under there, so in the back of my mind I'm trying to convince myself he was my knight in shining fur and ate it, but it more likely that its just waiting for me to turn off the light.

So now I sit here at the computer at midnight, knowing full well that my daughter will be up at 7am promptly, bugging me about setting up all the Halloween decorations., something I foolishly promised in order to hurry her to bed. But I can't sleep either. I'm seriously terrified of anything spider. I swear something horrible must have happened to me in another life that deals with spiders. Hurry Nick and come home and save me! Why is it whenever Nick goes away, something always has to happen to freak me out? I mean I already don't like when he's gone and things are good, the windows and doors are all super locked and bolted. Lights on outside etc. But jeez!! All I wanted to do was get to sleep. Oh well...this is my life and as much as you may laugh, I think I'll be sleeping on the couch tonight.

Friday, October 1, 2010

Tasty Treat Friday- Caramel Apple Cupcakes!

                               It's Tasty Treat Friday!!!

Following the inspiration of the seasons I decided to make Caramel Apple Cupcakes. Super yummy! Though they are more of a muffin I have to say. I reserve the word cupcake for something more chocolaty and piled with icing. If you are craving something apple, or you'd like caramel apples without all the mess and hassle, then this is your treat!


Caramel Apple Cupcakes

1 1/4 c. flour
2 t. baking powder
1/2 t. ground cinnamon
1/2 t. salt
2 eggs, at room temperature
1/2c packed light brown sugar
1/2 c. granulated sugar
1/2 c. vegetable oil
2 t. vanilla extract
2 rome apples, about 1 pound, peeled and shredded.
1 1/2c. chewy caramel candies
1 T. heavy cream

Preheat oven to 350*F. Line a cupcake pan with liners.

In a large bowl, whisk together the flour, baking powder, cinnamon, and salt.

In a medium bowl, whisk together eggs, brown sugar, granulated sugar until smooth. Whisk in the oil and vanilla. Stir into the flour mixture until just combined; stir in the apples.

Spoon the batter into the prepared pan until almost full.  Bake until golden and a toothpick inserted in the middle comes out clean, about 25-30 minutes. Transfer to a rack to cool completely.

In a small, microwavable bowl, combine the caramels and cream. Microwave for 1 minute on medium power, then stir, repeat in 30 second intervals until melted and smooth. Spread the frosting generously on the cooled cupcakes.

Tips/Adjustments: I used 2 granny smith apples since I couldn't find any romes at my grocery store, but they seemed to work fine. Yes the apples are shredded instead of diced, this is to allow for even distribution and to keep the cupcakes moist. I just used my box grater. Also to avoid the slightly harder bottom on a cupcake, I actually spray my liners with non-stick spray which keeps them moist and perfect to peel. Another great addition to mine, was I added chopped peanuts to the top of half of the cupcakes. It truly reminds you of a caramel apple.

Thanks to Rachael Ray Magazine for this recipe, and thanks to my mom for sending it to me!